Address Schedule
To access the schedule, navigate to the Address Schedule on the tree menu located on the left side of the screen under Company Information.
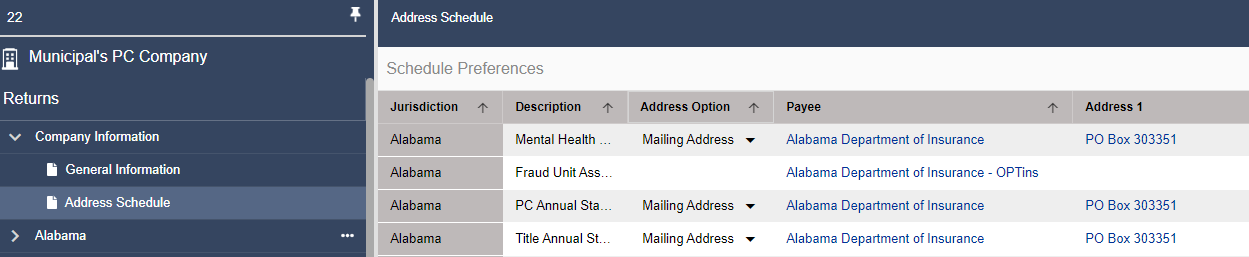
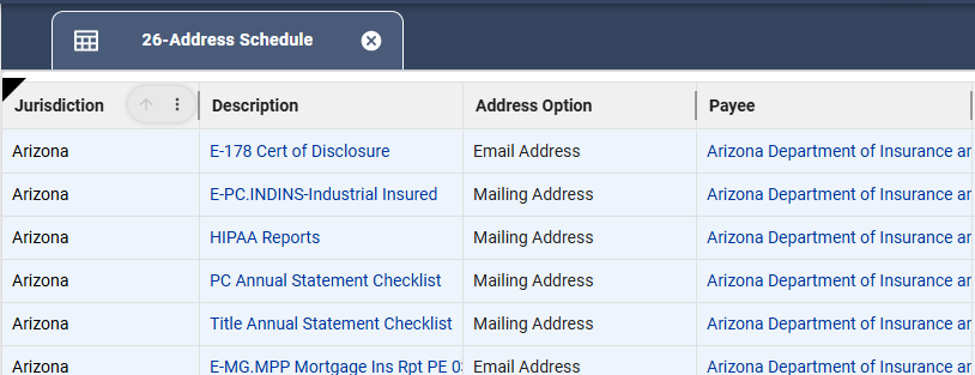
The Address Schedule contains address and contact information for each form in the software, including mailing and physical addresses, payee name, contact name, telephone number, contact email address, and a direct web link to the form location online.
Customizable Features of the Address Schedule
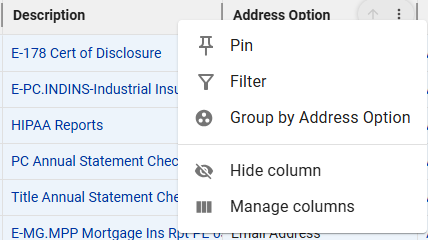
Additional options for each column can be accessed by selecting the three-dot menu in the column header.
Filter/Sort
Columns can be sorted in ascending or descending order by selecting the arrow icon in the column header. Columns can also be filtered from the column menu to help narrow down results.
Column Settings
Columns can be hidden from view by selecting the eye icon in the column header. To display hidden columns again, use the Manage Columns option and select the columns you want to show. Columns can also be pinned to the left side of the schedule, so they remain visible while scrolling horizontally.
Advanced Filtering
You can filter columns based on a variety of search conditions. Click on ‘Advanced filtering’ in the top right, and then select either ‘And’ or ‘Or’ Group to add a new filter. Select the column you would like to filter, the filter type, and the letter or keyword to search or filter for in the value field. Once you are done, click ‘Apply.’
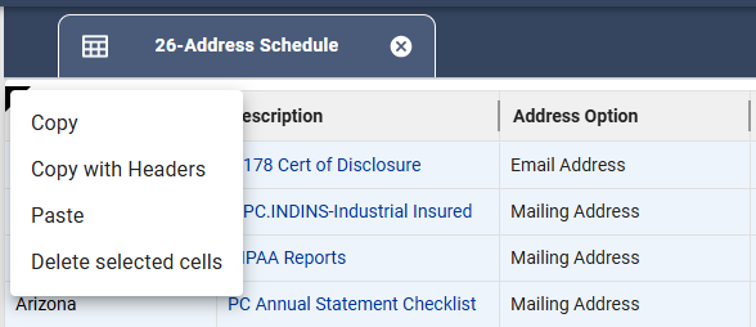
Cell Selection and Copying
Individual cells can be selected directly within the schedule. To select all cells in the schedule, use the triangle icon located in the top-left corner of the grid. Right-clicking within the schedule provides additional options such as Copy and Copy with Headers.